(click on either of those to go to the Amazon page for that book or one of the links below)
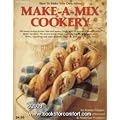
Make A Mix
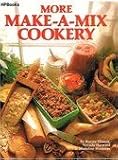
More Make A Mix
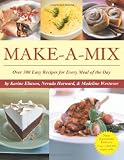
and Make A Mix Revised (has some recipes the others don't and vice versa).
There is also a Complete Make-a-mix Cookbook : How to make your Own Mixes.
I was looking for something a minute ago and ran across a portion of the Make A Mix book in google. It shows some of the master mixes and mentions the recipes that can be made from them.
I thought y'all might be interested in seeing what the book looks like.
Make-a-mix - Google Books
I make a lot of mixes from these books and have done so for a few years now. When I went back to couponing last year after a 6 year hiatus, I started getting pre-packaged mixes for free. Now that we've gone to eating organically, I am back to making my mixes again that we have gone through all most all of them (just have a few store bought cookie and brownie mixes left). I substitute fresh milled wheat flour in place of the all-purpose flour.
So check the books out if you get a chance. You can order them through Amazon, maybe find them on ebay, or look at your local used bookstore.
here are a few of the mixes from the Make A Mix Revised book I use on a regular basis: (some of the mixes are found in the other two books)
- Muffin Mix
- Buttermilk Pancake and Waffle Mix
- Taco Seasoning
- onion seasoning mix (which is kinda like Lipton and I use it to make dip with ... yum yum yum)
- crisp coating mix
- Cornbread mix
- quick mix (this is like bisquik and is very very very good)
I have also made and use occasionally just not used as frequently as the above ones. I haven't made some of these in a while though but will be making most of them again soon due to us going back to the homemade items, etc. and getting away from the prepackaged stuff more and more... not much store bought package stuff left here now.
- Hot Roll Mix
- BreadMaker Mix (when I still had the breadmaker, now I make my bread by hand and use another recipe)
- Graham cracker crust mix
- sweet quick bread mix
- all purpose cake mix
- snack cake mix
- vanilla pudding and pie filling mix
- cookie mix
- granola mix
- dried calico bean soup mix
- all purpose ground meat mix (this one is awesome)
- meatloaf mix
- meatball mix
- meat sauce mix
- mexican meat mix
- navy bean mix
- slice and bake cookies (various ones and these are an absolute favorite of mine... I even used one of the recipes as a basis to make up one of my own -- it's posted over in the recipe forum)
- chocolate syrup mix
- chili seasoning mix
- home-style dressing mix
- spaghetti seasoning mix
- chicken continental rice seasoning mix (fave of ours)
- spanish rice seasoning mix
- hot chocolate mix
- Russian refresher mix (kinda of like Russian Tea mix but doesn't call for instant tea)
That's the basic mixes I use. From those you can make various recipes with them.


